 |  |  |
 |  | 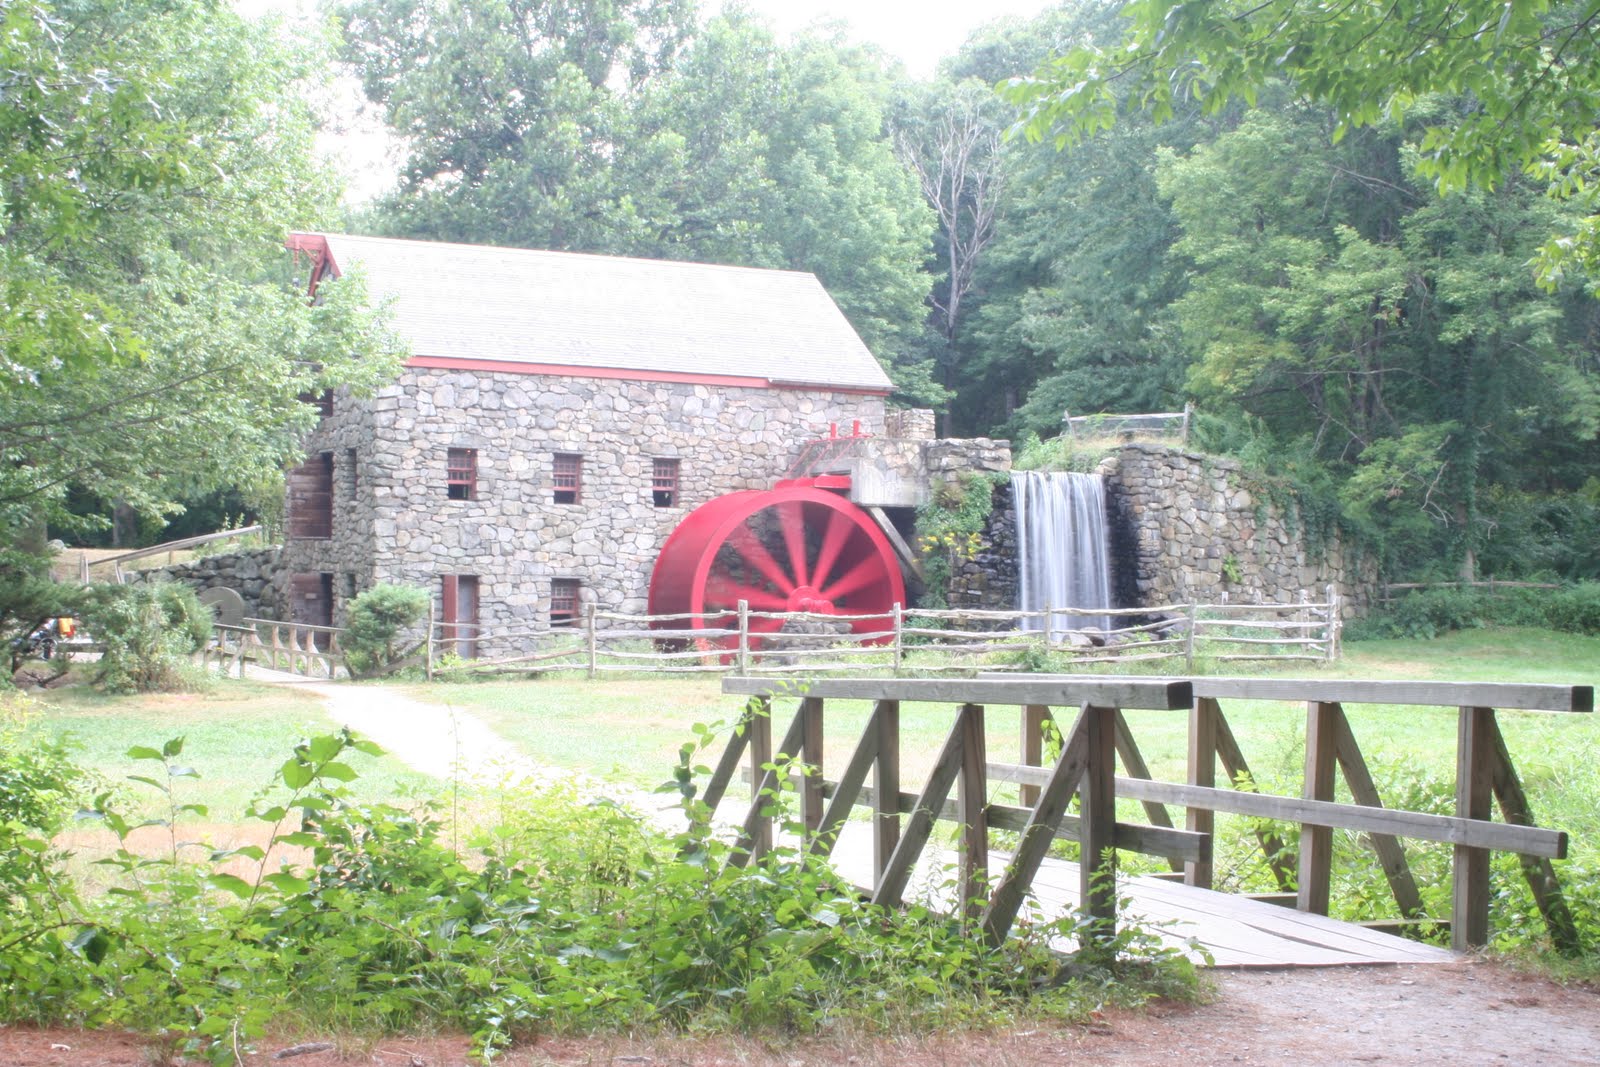 |
Source Photos, Wayside Inn, Sudbury MA. Shots taken at 28mm f/29 | ||
Success! (of a sort). The six images above were produced using the Arduino-based HDR trigger we built and programmed last time. Of note was the fact the fastest shots were not picked up or taken reliably, of the nine shots triggered, only seven were taken by the camera itself. Consequently, we're successfully tested our HDR trigger, what's more, we've discovered that it may not perform quite as quickly as we had hoped. In addition, in retrospect, Wayside Grist Mill may not be the best choice, simply because the water wheel is in motion and becomes motion-blurred in longer shots. Note that we could account for that in editing, but for the moment, we're mainly concerned about the overall function.. and it did what we wanted it to do- took a series of bracketing exposures.
If you are doing this yourself, the camera needs to be set up in Manual mode, with the shutter duration set to "bulb"- which basically means externally controlled (by our trigger, at the moment). The scene is focused and a very small aperture is set on the lens- for this example, I used the smallest available aperture on my kit EF-S 18-55mm lens, f/29. Using a small aperture helps to maintain a deep field of focus, as well as allowing for longer exposure times. Once the scene is focused the lens is then placed in Manual focus mode, to prevent the lens from wasting time hunting for focus, especially since it will be a static scene. If we've focused once, it'll remain in focus during our time shots.
If you are doing this yourself, the camera needs to be set up in Manual mode, with the shutter duration set to "bulb"- which basically means externally controlled (by our trigger, at the moment). The scene is focused and a very small aperture is set on the lens- for this example, I used the smallest available aperture on my kit EF-S 18-55mm lens, f/29. Using a small aperture helps to maintain a deep field of focus, as well as allowing for longer exposure times. Once the scene is focused the lens is then placed in Manual focus mode, to prevent the lens from wasting time hunting for focus, especially since it will be a static scene. If we've focused once, it'll remain in focus during our time shots.
Given the simplicity of the project, we shouldn't be displeased with the outcome. For processing, I chose ENFUSE!, with it's accompanying GUI. This is an Open Source software, and can be downloaded and used for non-commerical purposes under a GPL license. I processed the photos with the default software options, producing the HDR photo below. Now I'll agree it's probably not the most impressive HDR shot ever, however it does demonstrate that we're on the right track. We'll do some more shots after we address a few of the problems found, and see if we can get a little better at tweaking the software too. What's important to notice is that the HDR photo has uniform exposure across the entire scene- the brightness of the green trees in the foreground is lost in the "best" shot above, when the Mill is exposed well, leaving them underexposed. Conversely, some of the finer details are also lost to overexposure. The composite, or "High Dynamic Range" photo merges the exposures in an attempt to display all portions of the scene exposed properly.. at least that's the theory. In practice, it does a remarkable job at just that.. especially since this was our first attempt.
 |
| Composite "HDR" Photograph produced from source photos, above. |
Now, let's consider the other information learned:
Two images were dropped, we'll assume they were the first two, due to short duration...Of the seven shots, the first two are so similar in exposure we have to assume we merely hit minimum exposure time on the longest. If we use "Mirror Lockup" mode we may gain some speed, so it appears somewhere near 1/100 second may be the fastest we'll get via shutter port (I'm using my Canon Rebel XT, for reference).
Since we basically are saying the first three shots are being wasted, time wise, we're going to change our timing to begin at 1/100 second, as well as lock up the mirror in an attempt at getting just a little bit faster response. Eventually, we may move off of the shutter port and use USB to control the camera in much more precise a manner, but before we begin the rather painful undertaking of writing a USB host, we're going to explore and exploit the control we've gotten this far.
It's important to note that any camera that has the ability to be remotely triggered will work with this device also, simply modify the plug to match the connection for your camera, as long as what's required is a simple switch-closure to operate the shutter.
As always, you probably void your warranty by connecting something like this to your camera-- anything you do, you do at your own risk!
Here's our updated code.. we'll set up for seven shots now, with a minimum of 10ms (1/100sec).. otherwise everything remains the same.
int shotcount = 7;
int shutterPin = 5;
long mintime = 10;
long delaytime;
void setup()
{
pinMode(shutterPin, OUTPUT);
Serial.begin(9600); // setup to communicate by serial
}
void loop()
{
Serial.print("Sequence: "); // provide info by serial, if wanted
Serial.print(shotcount);
Serial.print(" shots, minimum ");
Serial.print(mintime);
Serial.println(" ms.");
int i=0;
delaytime=mintime;
while (i < shotcount)
{ // loop until we take all the shots
Serial.print("shot duration: "); // report out on serial line
Serial.print(delaytime);
Serial.println(" ms.");
digitalWrite(shutterPin, HIGH); // open the shutter
delay(delaytime); // wait for the exposure time
digitalWrite(shutterPin, LOW); // close the shutter
delay(2000); // wait two seconds for camera
delaytime=delaytime*2; // double duration for 1eV step
i=i+1;
};
Serial.println("Sequence Complete!");
while (1) {}; // Wait forever
}
Next time, we'll give our trigger another try with the new code, as well as look at how our Arduino looks at things...
It's important to note that any camera that has the ability to be remotely triggered will work with this device also, simply modify the plug to match the connection for your camera, as long as what's required is a simple switch-closure to operate the shutter.
As always, you probably void your warranty by connecting something like this to your camera-- anything you do, you do at your own risk!
Here's our updated code.. we'll set up for seven shots now, with a minimum of 10ms (1/100sec).. otherwise everything remains the same.
int shotcount = 7;
int shutterPin = 5;
long mintime = 10;
long delaytime;
void setup()
{
pinMode(shutterPin, OUTPUT);
Serial.begin(9600); // setup to communicate by serial
}
void loop()
{
Serial.print("Sequence: "); // provide info by serial, if wanted
Serial.print(shotcount);
Serial.print(" shots, minimum ");
Serial.print(mintime);
Serial.println(" ms.");
int i=0;
delaytime=mintime;
while (i
{ // loop until we take all the shots
Serial.print("shot duration: "); // report out on serial line
Serial.print(delaytime);
Serial.println(" ms.");
digitalWrite(shutterPin, HIGH); // open the shutter
delay(delaytime); // wait for the exposure time
digitalWrite(shutterPin, LOW); // close the shutter
delay(2000); // wait two seconds for camera
delaytime=delaytime*2; // double duration for 1eV step
i=i+1;
};
Serial.println("Sequence Complete!");
while (1) {}; // Wait forever
}
Next time, we'll give our trigger another try with the new code, as well as look at how our Arduino looks at things...
No comments:
Post a Comment