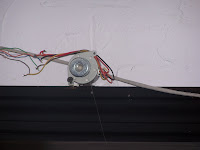
The first test of the Frankenbotic Thinganator... surprisingly, it worked the FIRST time!
Here is the code for this alpha test.. mainly to show basic operation. The next steps include developing the math and functions for x,y location.. translating coordinates to tension lengths will require a little bit of math.
#include <Stepper.h>
#define STEPS 48
Stepper stepper1(STEPS, 2,3);
Stepper stepper2(STEPS, 4,5);
void setup()
{
// set the speed of the motor to 30 RPMs
stepper1.setSpeed(30);
stepper2.setSpeed(30);
}
void loop()
{
for (int k=4; k>0; k=k-1) {
stepper1.step(10);
stepper2.step(10);
for (int j=3; j>0; j=j-1) {
for (int i=50; i>0; i=i-5) {
stepper1.step(i);
delay(0);
stepper2.step(i);
delay(0);
stepper1.step(0-i);
delay(0);
stepper2.step(0-i);
delay(0);
};
};
};
while (true) { }; // wait forever.
}
Two small steppers salvaged from trash printers operate the plotter, by using gravity as the third vector we can locate the pen anywhere on the drawing surface by varying the length of the lines it is suspended by. This design is also called a Wall Plotter or Whiteboard Plotter.
Spools for the line were made by using Super Glue to hold together a washer on each side of a nut, then superglued to the small gears that were present on the stepper motor shafts. A card table was stood on a folding chair to make a drawing surface.. since I built this in a doorway, there's no immediate surface for the plotter to work on. If wall-mounted, the wall serves as the plotting surface.
Also, since the "easel" isn't exactly vertical, a bit of inaccuracy and jerkiness is caused-- but again, this is just an alpha test of a prototype.. final versions will account for and eliminate this problem.


No comments:
Post a Comment